Picture this: Your flight’s next week, bags are open, and your mind is racing—what haven’t you packed or prepared for your semester far from home? That last-minute scramble, the ‘did I miss something?’ feeling… it’s not just stressful, it can turn an epic adventure into an anxious mess.
Miss a crucial document and you might spend your first days in red tape, not exploring your new city. Skipping a smart packing strategy could mean missing essentials (and shelling out extra cash overseas). Planning ahead isn’t just nice—it’s non-negotiable for peace of mind and a smooth start in another country.
By the time you finish, you’ll have a study abroad checklist printable guide packed with practical steps, sanity-saving reminders, and the confidence you need for your semester abroad. Ready to ditch the stress?
Essential Documents You Can’t Forget Before Leaving
Packing up for your semester abroad? There’s always that last-minute fear: what if you arrive and you’re missing the one critical document you need? It’s more common than you’d think — and a single overlooked paper can mean missed classes or, worse, an immediate trip home.
The truth is: visa requirements, travel regulations, and university processes can change quickly and often differ depending on your destination. Documentation isn’t just passports or tickets. You’ll deal with everything from immunization records to insurance proof, depending on country and school requirements. Missing even one could cost you time, money, and peace of mind.
⚠️ Important Warning: Official guidelines from the U.S. Department of State and Alliance for International Exchange stress: keep original documents and at least two separate sets of copies, stored in different bags — don’t rely on digital scans alone, as border officials rarely accept them.
Must-Have Documents Before You Board
- Passport (and Validity): It should be valid for at least six months after your return date.
- Student Visa: Match the type to your host country — check for entry, duration, multiple-entry, and renewal requirements.
- Acceptance Letter & Enrollment Confirmation: These are essential at immigration and for school registration.
- Proof of Insurance: Carry documents for health, travel, and personal property insurance. Some countries require a specific policy or pre-approval.
- Immunization & Medical Records: Many universities require proof of vaccines, and some ask for a doctor’s clearance letter.
- Financial Documents: Bank statements, proof of scholarship, or a sponsorship letter may be required for your visa interview and local authorities.
Picture this scenario: You arrive in Paris, show your passport at border control, and the officer immediately asks for your acceptance letter. You find it in your backpack, but your friend forgot theirs in checked luggage—that turns a swift entry into an hour-long ordeal. Real stories, real stakes.
| Document | Where to Obtain | Special Tip |
|---|---|---|
| Passport | Government agency or consulate | Apply at least 3 months early |
| Visa | Host country consulate | Request a student (not tourist) visa if possible |
| Insurance Proof | Insurance provider portal or email | Print a local language copy if available |
| Acceptance Letter | University admissions office | Keep digital and printed copies |
| Medical Records | Personal doctor or clinic | Include a translated summary if traveling abroad |
Start assembling everything at least one month before departure to give yourself time to resolve missing paperwork. If you have specific health or legal concerns — or you’re not sure if a certain document is required for your case — consider consulting a travel advisor or your school’s study abroad office for updated information.
But there’s one detail most travelers completely overlook until it’s too late…
Packing Smart: What to Bring and What to Leave Behind
There’s nothing like the stress of trying to stuff your entire life into a single suitcase—only to realize at the airport that you packed for the wrong climate, or worse, forgot something essential. What if you could avoid those infamous rookie mistakes and actually travel light, knowing you have everything you’ll really use?
Packing for a semester abroad is all about balance: bringing must-have items, skipping those “just in case” extras, and thinking ahead about what you’ll need for studies, daily life, and sudden surprises. Airlines have clear baggage rules (like weight limits and carry-on size), and some campus dorms are tiny—so strategic packing isn’t just smart, it’s necessary.
💡 Pro Tip: According to the International Student Identity Card Association (ISIC), rolling clothes instead of folding them can save up to 30% more space, and vacuum storage bags help maximize your allowance when bulky winter gear is needed.
- Start With Essentials: Passport, visa, key documents, glasses/contacts, daily medications, and a basic first-aid kit.
- Choose Versatile Clothing: Pack for layering. Bring neutral colors and focus on comfort for the local climate. Avoid packing for “what if” parties—you’ll find local options once there.
- Electronics: Dual-voltage charger and a universal plug adapter (not all plugs are the same worldwide). Bring a lightweight laptop and headphones. Leave extra extension cords—they’re often incompatible abroad.
- Academic Gear: Required textbooks (verify if digital editions are available), a small notebook, and a compact backpack for day trips.
- Specialty Items: Any prescription medications with doctor’s letter, allergy cards in the local language, and a favorite pair of comfortable shoes—you’ll walk more than you think.
In practice: Imagine arriving in Japan with a suitcase full of heavy coats, but it’s early autumn—students from warmer climates often overpack winter clothes and regret lugging them across continents. Seasoned travelers check the local forecast and campus forums, then pack one good jacket and buy or borrow heavier gear if needed.
- Bring: Layering basics, travel-size toiletries (enough for two weeks), two pairs of reliable shoes, local currency for arrival, and small souvenirs from home (great icebreakers).
- Skip: Full-size shampoo bottles, hairdryers (buy locally if needed), too many books, luxury handbags, and anything you haven’t worn in the last six months.
| Item | Must Bring | Leave Behind |
|---|---|---|
| Winter Coat | Only if destination requires | All-weather jackets for tropical countries |
| Textbooks | Check digital/used availability | Bulky hardcovers not required |
| Adapters | Universal plug & charger | Bulky multi-outlet strips |
| Towels | Quick-dry microfiber towel | Full-size bath sheets |
And this is exactly where most people make the most common mistake…
Health and Safety Steps for International Students
Ever wonder what might derail your semester abroad—beyond homesickness or jet lag? Health and safety issues top the list, and it’s not just about packing a first-aid kit. The real challenges happen when you’re caught off guard by unfamiliar healthcare systems, medication restrictions, or subtle risks in a new country.
Health coverage and local safety norms aren’t universal. What’s standard back home might be unheard of where you’re headed. Many schools require proof of immunization and insurance—sometimes specific policies that cover medical evacuation or mental health. The World Health Organization recommends checking updates for your destination at least one month before you go.
⚠️ Important Warning: Not all prescription medications are legal abroad, and some require special documentation at customs. Always consult a travel doctor or your campus health center for up-to-date country requirements and travel advisories regarding health and personal safety.
- Confirm Your Health Insurance: Make sure your coverage works internationally, including emergency and repatriation. If not, shop for a student-specific plan that meets your school’s and host country’s requirements.
- Book a Pre-Departure Health Visit: A checkup isn’t just a formality—it’s a chance to get needed vaccines, refill medication, and request official prescription letters or allergy documentation.
- Prep Your Health Documents: Have digital and paper versions of your insurance card, immunization history, and doctor’s letters for any ongoing conditions.
- Learn Emergency Procedures: Know the local numbers for police, fire, and medical help. Find out where the nearest pharmacy and hospital are at your destination.
- Understand Local Safety Norms: Brush up on cultural attitudes regarding street safety, food hygiene, water, and transportation. The CDC and your host university will have guidelines tailored for students.
In practice: Picture this scenario—a student lands in Seoul, feeling under the weather. Their usual cold medicine is unavailable locally and importing it is restricted. Luckily, they’d already gotten an official list of approved over-the-counter medications and kept translations handy for the pharmacist. It turned an awkward moment into an easy fix.
- Download your embassy’s emergency app for real-time alerts.
- Pack a small medical kit with approved prescription and OTC items.
- Save copies of key contacts: school, embassy, and trusted health providers.
| Coverage | What to Verify | If Not Included |
|---|---|---|
| Emergency | Evacuation + catastrophe coverage | Look for “study abroad” insurance plans |
| Prescriptions | Accepted in host country | Get local substitute before leaving |
| Mental Health | Access to support or counseling | Contact host institution resources |
What actually works might surprise you…
Managing Finances and Budgeting Abroad
How can you make your money last for a full semester abroad — without constant anxiety about hidden fees, fluctuating exchange rates, or blowing your budget before finals? Smart financial prep starts before you even land and keeps you out of that nail-biting end-of-month panic.
International banking is different. Many major banks charge foreign transaction and ATM fees, and digital wallets or cashless payments aren’t accepted everywhere. Budgeting abroad requires you to track everything from tuition to groceries, with an eye on currency shifts and out-of-pocket surprises. The National Association of Foreign Student Advisers (NAFSA) recommends building a buffer for emergencies and always monitoring spending through a mix of digital and on-paper tools.
💡 Pro Tip: Open a student-friendly account with a global bank (like HSBC or Santander) before leaving. Most waive some international fees for students and offer online budgeting tools tailored for expats.
- Estimate Monthly Costs: Calculate rent, food, transport, phone, supplies, and an entertainment allowance.
- Choose Smart Payment Methods: Bring a no-foreign-fee debit card and a backup travel credit card. Don’t rely on cash alone.
- Set Up a Budgeting Tracker: Apps like Revolut, Mint, or YNAB give real-time alerts and multi-currency support. Even a simple spreadsheet works — it’s the habit that counts.
- Monitor Exchange Rates: Track currency swings for big payments. Use alerts or lock in a favorable rate when sending money internationally.
- Create an Emergency Fund: Keep at least enough for a plane ticket home, separate from daily expenses. Safety net first, convenience second.
In practice: Picture this scenario — You’re studying in Berlin, loving the city, but halfway through the month your account dips dangerously low. A quick check shows €100 slipped on small café purchases and unplanned U-Bahn passes. Tracking each expense with your budgeting app helps — and lets you pivot your plans before it’s too late.
| Banking Choice | Pros | Cons |
|---|---|---|
| HSBC Student Account | Global ATMs, no currency fee | Requires branch setup |
| Santander International | Campus-based support, student perks | Monthly minimum balance |
| Revolut App | No ATM fees, instant transfers | App-based support only |
And this is exactly where most people make the most common mistake…
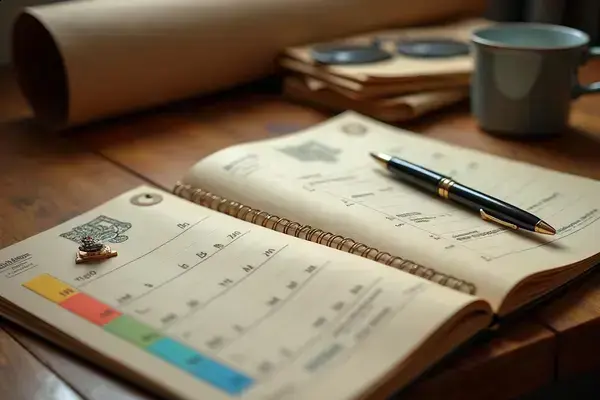
Organizing Your Academic and Personal Checklist
Ever feel like you’re juggling loose ends in the weeks before departure, wondering if your academics or daily life will implode over a missed email or forgotten deadline? That’s exactly why organizing your academic and personal checklist before leaving is such a game changer.
Success abroad isn’t just about showing up—it’s the result of working out the details behind the scenes. Think study visas, course registration, housing confirmations, and updating key contacts, all timed so nothing falls through the cracks. The Institute of International Education notes that students who use checklists consistently finish more pre-departure tasks on time and report less stress during their transition.
💡 Pro Tip: Print two copies of every critical checklist and keep one in your carry-on, one in your luggage. Paper lists don’t run out of battery, and having a backup could save the day if you lose access to your phone mid-journey.
- Academic Checklist: Register for courses, request transcripts, confirm credit transfer approval, arrange academic advising, and sign up for local language orientation if available.
- Personal Checklist: Update emergency contacts, finalize accommodation, confirm airport pickup, arrange mobile service or SIM card, and set up a communication plan with family.
- Logistics: Scan all documents (passport, visa, insurance), upload to secure cloud storage, and write down passwords in a safe but analog backup.
- Calendar Reminders: Set up alerts for visa renewal dates, tuition payments, and application deadlines using a digital or paper planner. Google Calendar and Notion are favorites for visual tracking, but a wall calendar by your desk works too.
- Mental Prep: Make a “bucket list” of experiences for your destination—mixing admin with anticipation keeps motivation high during last-minute prep.
In practice: Picture this scenario—a student lands in Florence but can’t access the university system because they missed an emailed PIN code deadline. Having a printed checklist with all registration steps and deadlines listed meant they could solve it within hours (instead of days) by quickly calling the right office with the info in hand.
| Task | Recommended Tool | Why It Works |
|---|---|---|
| Course Registration | University portal/Notion | Syncs deadlines & documents |
| Document Backup | Google Drive + printed copy | Cloud access and offline safety |
| Important Dates | Google Calendar/wall planner | Visual reminders prevent missed deadlines |
| Personal Goals | Handwritten or Notes app | Personalize to keep motivation high |
The right habits in place now make everything easier from here.
Your Semester Abroad Starts Strong
If you take just one thing from this study abroad checklist printable guide, let it be this: preparation brings peace of mind. You now know which essential documents to carry, how to pack smart, what steps to take for your health and safety, and how to organize finances and deadlines before even setting foot on campus.
Before, planning for a semester abroad might’ve felt messy and overwhelming — like you were always missing a step. Now, you’ve got a clear plan, fewer surprises, and real strategies to make your adventure smoother and more fun. Tiny details add up fast. You’re ready for the good stuff.
What’s the one thing you still have questions about before leaving? Let us know in the comments — your new adventure is about to begin!

Alex Jordan Bennett is a student success enthusiast and academic planning writer dedicated to helping college students stay organized, manage their time, and build the habits they need to thrive. With a passion for practical study systems, campus life guides, and career preparation tools, Alex built this blog to give every student the practical resources they need to succeed from freshman year through graduation and beyond.